
hayward pro series sand filter manual
Hayward Pro Series Sand Filter Manual: A Comprehensive Guide
This manual details the installation, operation, maintenance, and troubleshooting of your Hayward Pro Series sand filter, ensuring optimal pool water clarity and longevity.
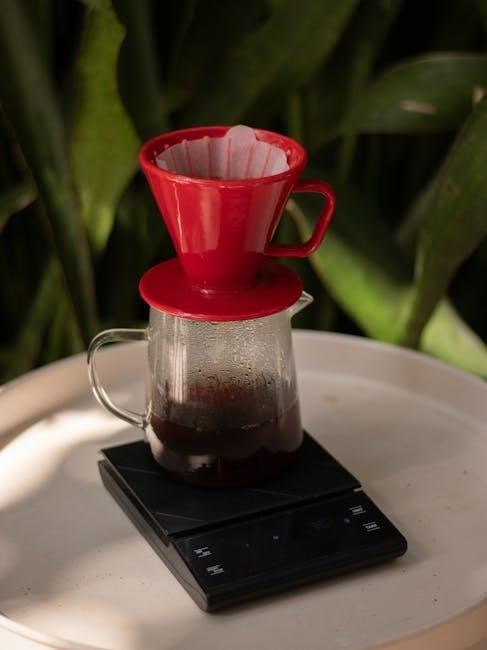
Hayward Pro Series sand filters are a popular choice for both above and inground pools, renowned for their effective filtration and durability. These systems utilize silica sand to trap debris, providing crystal-clear water. Understanding your filter’s components, particularly the multiport valve (like the SP0714T for the S210T model), is crucial for proper operation.
Regular maintenance, including backwashing and sand replacement, is essential to maintain peak performance. Issues like low pressure, reversed water flow, or leaks (even small drips from the pressure gauge) indicate potential problems requiring attention. This guide will walk you through troubleshooting common issues and performing necessary repairs, ensuring a consistently clean and enjoyable swimming experience. Remember to always consult your Hayward owner’s manual for specific instructions.
Understanding the Pro Series Filter System
The Hayward Pro Series filter operates by circulating pool water through a bed of sand, effectively removing dirt, debris, and impurities. Water enters through the multiport valve, which controls the flow path for various functions – filtering, backwashing, rinsing, and waste. Proper suction, often strongest from the skimmer closest to the pump, is vital for efficient operation.
The system’s efficiency relies on maintaining a consistent flow rate, compatible with your pump’s horsepower. Issues like sand channeling, where water bypasses the sand bed, can reduce filtration effectiveness. Regular inspection of the pump basket is also key. Understanding these core principles will empower you to diagnose and address any performance issues, ensuring consistently clean pool water.

Installation and Setup
Proper installation involves initial setup procedures, secure plumbing and electrical connections, and utilizing the correct sand type and quantity for optimal performance.
Initial Setup Procedures
Before starting, ensure the filter is placed on a solid, level surface capable of supporting its weight when filled with water and sand. Carefully inspect all components for any shipping damage. Prior to connecting plumbing, familiarize yourself with the multiport valve positions – Filter, Backwash, Rinse, and Waste – understanding their functions is crucial.
Lubricate all O-rings with a silicone-based lubricant to ensure a watertight seal and prevent damage during assembly. Double-check that the drain plug is securely tightened to prevent water leakage. It’s recommended to pre-fill the filter tank with water before adding sand; this minimizes dust and aids in proper sand settling. Always refer to your specific model’s diagram for correct component placement and orientation during this initial phase.
Connecting Plumbing and Electrical Components
Proper plumbing connections are vital for efficient operation and preventing leaks. Use appropriate PVC primer and cement for all pipe connections, ensuring a secure and lasting bond. Connect the pump discharge to the filter’s inlet, and the filter’s outlet to the pool’s return line.
When connecting the multiport valve, verify the alignment of the port openings to match your existing plumbing. Electrical connections should be performed by a qualified electrician, adhering to all local codes. Ensure the pump is properly grounded. Before energizing the system, double-check all connections for tightness and proper sealing. A small drip can lead to significant water loss and potential damage.
Sand Type and Quantity Requirements
Using the correct sand is crucial for effective filtration. Hayward Pro Series filters require #20 silica sand, with an effective size of 0.45-0.55mm. Avoid using calcium carbonate sand, as it can damage the filter. The quantity of sand needed varies depending on the filter model; consult your filter’s specifications for the precise amount.
Generally, filling the filter tank to approximately two-thirds full is recommended. Overfilling can reduce filtration efficiency and potentially damage the internal components. When replacing sand, consider removing only the top layer initially and replacing it, to address channeling issues before a full sand change.

Operation and Functionality
The Pro Series filter utilizes a multiport valve for various functions: filter, backwash, rinse, and waste, enabling efficient pool water cleaning and maintenance.
Filter Modes: Filter, Backwash, Rinse, Waste
Filter Mode is the standard setting for normal pool operation, circulating water through the sand bed to remove impurities. Backwash Mode reverses the water flow, flushing out accumulated dirt and debris through the waste line – essential for maintaining filter efficiency. After backwashing, utilize Rinse Mode briefly to resettle the sand bed before returning to the filter setting.

The Waste Mode bypasses the filter entirely, directly sending water to the waste line; this is useful for quickly draining the pool or removing large debris. Remember to always turn off the pump before changing valve positions. Proper sequencing of these modes ensures optimal filtration and extends the life of your Hayward Pro Series sand filter. Following the manual’s instructions is crucial for correct operation.
Understanding the Multiport Valve
The multiport valve is the central control hub of your Hayward Pro Series sand filter, directing water flow for various functions. It features distinct positions – Filter, Backwash, Rinse, Waste, and Closed – each serving a specific purpose. The valve handle must be in the “Locked” position when transitioning between modes, preventing accidental shifts during operation.
Internal O-rings are critical for a leak-free seal; replacement is recommended during maintenance. Note the top and bottom O-rings differ in size. Proper alignment and secure locking are vital for efficient operation. Inspect the valve regularly for cracks or damage. Refer to the SP0714T valve diagrams for detailed component identification and maintenance procedures.
Normal Operating Pressure Ranges
Maintaining proper pressure is crucial for optimal filter performance. Typically, a clean Hayward Pro Series sand filter should exhibit a pressure reading between 20-30 PSI when the pump is running. As the filter traps debris, the pressure will gradually increase.
A reading exceeding the manufacturer’s recommended maximum (usually around 50 PSI) indicates the need for backwashing. Conversely, consistently low or zero pressure, as observed in new filters, suggests potential issues like reversed water flow or obstructions. Regularly monitor the pressure gauge and address any significant deviations promptly. A small drip from the gauge itself may require re-application of plumber’s tape.
Maintenance and Troubleshooting
Regular upkeep and prompt issue resolution are vital for a consistently clean pool. This section covers cleaning, backwashing, sand replacement, and common problem-solving.
Regular Filter Cleaning Procedures
Maintaining a clean filter is paramount for efficient operation and water clarity. Regularly inspect the pump basket, removing any debris like leaves or hair, as a significantly smaller air pocket bubble indicates good function. Periodically check the pressure gauge for readings outside the normal range; a tiny drip leak might indicate improper tightening, requiring plumber’s tape.
Visually inspect the filter tank for cracks or damage. Ensure the multiport valve is free of obstructions and operates smoothly. Before changing the sand entirely, consider removing and replacing just the top inch of sand to address early signs of clumping or channeling. Remember to always consult your Hayward owner’s manual for specific guidance tailored to your model.
Backwashing: Step-by-Step Instructions
Backwashing reverses water flow to flush out accumulated debris from the sand bed. First, turn off the pump. Pull the multiport valve handle UP to the LOCK position. Rotate the handle to the BACKWASH setting. Ensure the waste line is properly directed. Turn the pump back ON and allow it to run until the water in the sight glass clears – typically 2-3 minutes.
Next, turn the pump OFF again, return the valve handle to the LOCK position, and rotate it to the FILTER setting. Restart the pump. After backwashing, it’s crucial to briefly rinse the filter by setting the valve to RINSE for about 30-60 seconds before returning to FILTER mode for normal operation. Regularly scheduled backwashing maintains optimal filter performance.
Replacing the Sand: When and How
Sand replacement is typically needed every 3-7 years, or when channeling occurs. Before a full replacement, try removing and replacing the top inch of sand. To replace all the sand, turn off the pump and drain the filter completely. Remove the multiport valve and carefully scoop out the old sand.
Ensure you use the correct grade and quantity of sand specified in your filter’s manual. Slowly refill the filter with new sand, avoiding compaction. Reinstall the multiport valve, ensuring proper alignment and sealing with new O-rings. Channeling, often caused by oversized pumps, indicates a need for sand replacement.

Component Specifics
Detailed examination of key parts – the multiport valve, pressure gauge, and pump basket – is crucial for maintaining peak performance and identifying potential issues.
Multiport Valve Repair and Maintenance
The multiport valve is the heart of your filtration system, controlling water flow for various functions. Regular inspection is vital; look for leaks, particularly around the valve handle. A common issue involves worn O-rings, necessitating replacement – remember the bottom piston O-ring is smaller than the top one.
When disassembling, carefully note the position of internal components. After backwashing, always ensure the valve handle is in the “LOCK” position before restarting the pump. If water flows out the waste line while on the filter setting, O-rings likely need replacing. Proper lubrication with a silicone-based lubricant during reassembly is essential for smooth operation and a watertight seal. Ignoring these steps can lead to reduced filtration efficiency and costly repairs.
Pressure Gauge Troubleshooting (Leak Identification)
The pressure gauge provides crucial insight into filter performance. A steady reading indicates normal operation, while fluctuations suggest issues. A common problem is a leak from the gauge itself, often stemming from improper installation or worn threads. If you notice a drip – even a slow one – immediately shut down the system.
Carefully remove the gauge and inspect the threads for damage. Re-apply plumbers tape (PTFE tape) generously, ensuring a tight seal when re-installing. A leaking gauge isn’t just a water waste; it can also provide inaccurate readings, hindering effective troubleshooting. If the leak persists after re-taping, the gauge itself may be faulty and require replacement.
Pump Basket Inspection and Cleaning
Regularly inspecting and cleaning the pump basket is vital for maintaining optimal system performance. Debris accumulation restricts water flow, reducing filtration efficiency and potentially damaging the pump. A significantly smaller air pocket bubble in the basket suggests effective debris capture, but doesn’t negate the need for routine checks.
Before each cleaning, always shut off the pump power. Remove the basket and discard any leaves, hair, or other collected materials. Inspect the basket for cracks or damage, replacing it if necessary. Ensure the basket is properly seated when reinstalled to prevent water bypass. Consistent basket maintenance minimizes strain on the pump and extends the life of your Hayward Pro Series filter system.

Troubleshooting Common Issues
Addressing issues like low pressure, reversed water flow, or water exiting the backwash port while filtering is crucial for maintaining a clean pool.
Low Pressure Readings and Causes
Low pressure readings on your Hayward Pro Series sand filter can indicate several potential problems requiring investigation. A partially or fully clogged filter is a primary cause, as accumulated debris restricts water flow. Inspect the pump basket for obstructions; a significantly smaller air pocket bubble suggests it’s working, but still check.
Restricted plumbing lines, such as kinks in hoses or closed valves, can also contribute to low pressure. Furthermore, a dirty or malfunctioning pressure gauge itself might provide an inaccurate reading. Consider replacing the gauge if suspected. Finally, channeling within the sand bed – where water finds paths of least resistance – can reduce overall pressure. Addressing these issues promptly will restore optimal filter performance.
Water Coming Out of Backwash While on Filter
Experiencing water discharge from the backwash port while the filter is set to “Filter” signifies an internal issue within the multiport valve. This typically indicates worn or damaged O-rings, preventing a complete seal between valve positions. The valve directs water to the waste line (Port A) during backwashing, and a faulty seal allows this to occur even in filter mode.
Immediate action is required to prevent continuous water loss and potential pump damage. Replacing the top and bottom O-rings is often the solution; remember the bottom O-ring is slightly smaller. Inspect the valve body for cracks or damage as well. A complete valve replacement (SP0714T for S210T models) might be necessary if the damage is extensive.
Reversed Water Flow Through the Filter
If water flows through the filter in reverse – exiting via the waste line while on the “Filter” setting – the multiport valve is almost certainly the culprit. This means water and dirt are bypassing the sand bed entirely, rendering the filtration process ineffective. This condition mirrors symptoms of water exiting the backwash port unexpectedly.
The primary cause is a malfunctioning multiport valve, specifically compromised internal seals (O-rings). A thorough inspection and replacement of both the top and bottom O-rings are crucial first steps. Ensure correct sizing during replacement. If the issue persists, the valve itself may be damaged and require complete replacement. Check for debris obstructing proper valve operation.

Parts and Replacements
Locating genuine Hayward Pro Series replacement parts, like the SP0714T valve, is essential for maintaining peak performance and extending the filter’s lifespan.
Identifying Common Replacement Parts (SP0714T Valve)
The Hayward SP0714T multiport valve is a frequently replaced component in the Pro Series sand filter system, often due to wear and tear on internal seals. Identifying this valve is crucial when ordering replacements. It’s specifically designed for the S210T model, ensuring compatibility and proper function. When replacing, pay close attention to the O-rings; the bottom piston O-ring is slightly smaller than the top one, requiring correct sizing for a watertight seal.
Beyond the valve itself, common replacements include the pressure gauge (due to potential leaks), and various O-rings throughout the system. Always consult a parts diagram to verify the correct part number before ordering. Proper replacement ensures continued efficient filtration and prevents costly repairs down the line.
O-Ring Replacement Procedures (Top vs. Bottom)
Replacing O-rings within the SP0714T multiport valve is essential for maintaining a leak-free seal and optimal filter performance. A critical detail is recognizing the size difference between the top and bottom O-rings. The bottom piston O-ring is noticeably smaller and must be replaced with the correct size to avoid compression issues and leaks.
Before installation, lightly lubricate the new O-rings with a silicone-based lubricant. Carefully inspect the valve body for any debris or damage that could compromise the seal. Ensure the O-rings are seated correctly within their grooves before reassembling the valve. Incorrect installation can lead to persistent leaks and reduced filtration efficiency.
Finding Hayward Pro Series Parts Diagrams
Accessing accurate parts diagrams is crucial when servicing your Hayward Pro Series sand filter. Hayward’s official website is the primary resource, offering exploded views detailing every component of various Pro Series models. These diagrams are invaluable for identifying specific parts needed for repairs or replacements, like the SP0714T valve assembly.
Alternatively, many online pool supply retailers also host parts diagrams for common Hayward filters. Searching by your filter model number (e.g., S210T) will yield relevant results. Always verify the diagram matches your specific filter version to ensure accurate part identification. Diagrams clearly illustrate component relationships, simplifying maintenance and repair procedures.
Advanced Considerations
Optimizing filtration involves addressing sand channeling, ensuring proper pump horsepower compatibility, and maximizing water flow for peak efficiency and clarity.
Addressing Sand Channeling Issues
Sand channeling occurs when water finds paths of least resistance through the filter media, reducing its effectiveness. This often happens as the sand ages and clumps together, or when the pump’s horsepower is too high for the filter’s capacity. Initially, try removing the top inch of sand and replacing it with fresh sand – a temporary fix.
However, persistent channeling indicates a more significant problem. A pump moving too much water too quickly disrupts the sand bed’s structure. Ensure your pump’s flow rate aligns with the filter’s specifications. Consider a pump with lower horsepower if necessary. Regularly backwashing helps redistribute the sand, but won’t resolve established channels. Ultimately, complete sand replacement might be required for optimal filtration performance.
Pump Horsepower and Filter Compatibility
Matching pump horsepower to your Hayward Pro Series sand filter is crucial for efficient operation and preventing damage. An undersized pump won’t provide adequate flow for effective filtration, while an oversized pump can cause channeling within the sand bed. Channeling reduces filtration effectiveness and can lead to premature sand degradation.
Refer to your filter’s specifications to determine the recommended pump horsepower range. Consider the pool’s volume and plumbing resistance when selecting a pump. If you suspect your pump is too powerful, reducing the flow rate via valve adjustments or installing a smaller pump is advisable. Proper compatibility ensures optimal performance and extends the lifespan of both the pump and filter.
Optimizing Water Flow for Efficient Filtration
Achieving optimal water flow is key to maximizing your Hayward Pro Series sand filter’s performance. Ensure all plumbing connections are correctly sized and free of obstructions. Regularly inspect and clean the pump basket to maintain consistent flow rates. Proper water velocity through the filter bed effectively traps debris, resulting in clearer pool water.
Avoid excessively high flow rates, as they can contribute to sand channeling. Monitor the pressure gauge; a consistently low reading may indicate insufficient flow, while a high reading suggests a blockage. Adjust valves to balance flow and ensure even distribution through the filter media. Consistent monitoring and adjustments will enhance filtration efficiency.

Safety Precautions
Always disconnect power before servicing. Handle components carefully, and winterize the filter properly to prevent damage from freezing temperatures and ensure safety.
Electrical Safety Guidelines
Prior to any maintenance or inspection of the Hayward Pro Series sand filter system, always disconnect the electrical power supply to the pump. This is a critical safety precaution to prevent electrical shock. Ensure the circuit breaker is switched off and, ideally, locked out to prevent accidental reactivation during work.
Inspect all electrical connections for damage or corrosion. Replace any frayed or damaged cords immediately. When reconnecting power, verify proper grounding to minimize the risk of electrical hazards. Never attempt electrical repairs unless you are a qualified electrician. Improper wiring can lead to dangerous situations.
Always adhere to local electrical codes and regulations. Keep electrical components dry and protected from the elements. Remember, water and electricity are a dangerous combination.
Proper Handling of Filter Components
When disassembling the Hayward Pro Series sand filter for maintenance, handle all components with care to avoid damage. The multiport valve, in particular, contains delicate internal parts like O-rings and pistons that require gentle handling. Avoid using excessive force when loosening or tightening connections.
Pay close attention to the orientation of parts during disassembly to ensure correct reassembly. Note the difference in size between the top and bottom O-rings – using the wrong size can cause leaks. Store removed parts in a clean, organized manner to prevent loss or contamination.
Dispose of old sand and filter media responsibly, following local regulations. Always wear appropriate safety gear, such as gloves and eye protection, when handling filter components.
Winterizing Your Hayward Pro Series Filter
Proper winterization is crucial to protect your Hayward Pro Series sand filter from freeze damage. Begin by thoroughly backwashing the filter to remove any debris. Next, drain all water from the filter tank, multiport valve, and associated plumbing lines. Remove the drain plug at the bottom of the filter tank to ensure complete drainage.
After draining, open the air relief valve on top of the filter to allow any remaining water to escape. Consider using a shop vacuum to blow out any residual water in the lines. Store the multiport valve in the upright position.
Finally, plug all open ports to prevent debris from entering during the off-season.